
Why do I receive a “System Unavailable” pop-up message when installing e@syFile Thin Client?
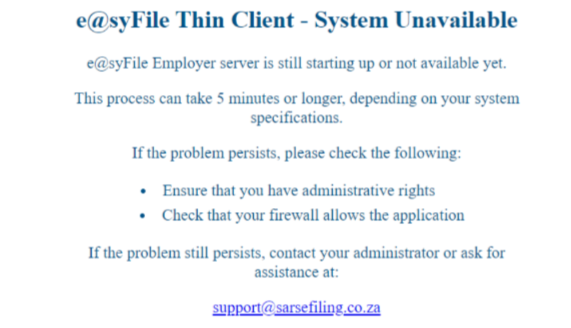
You need to first check if your computer meets the minimum requirements, which are Windows 10 or later and at least 8GB RAM.
Open Settings:
- Go to System > About.
- If you have less than 8GB RAM, the new e@syFile application will not be able to create the DB that it requires to run and store employer information.
- If you have less than 8GB RAM, you will need to upgrade your RAM.
Check if the EasyFile IP address is positioned correctly or appears in your host file.
- Click on the Widows start button your taskbar and type “notepad”.
- Right click on the notepad and select “Run as Administrator”.
- Once the notepad is open, click on “File > Open”.
- Go to Windows.
- Click on System32.
- Click on Drivers.
- Click on etc.
- Click on the drop-down box at the bottom of the window, and select “All Files”.
- Click on Hosts, then scroll to the bottom of the text document and look for “127.0.0.1 easyfile.sars.gov.za”, which is the EasyFile Server IP address.
- The IP address should be in its own line like in the screenshot below.
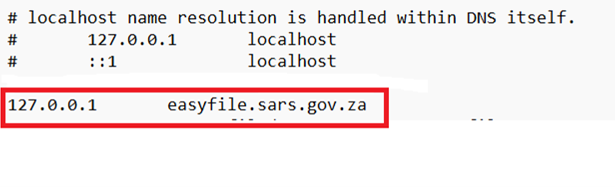
- If it shares a line with another entry, place the cursor in front of the IP address and press enter, which will place the IP address in its own line.
- Save the file and close.
Next you need to check that only one version of e@syFile is installed, which is DesktopClient.
- Open your C Drive.
- Go to EasyFileEmployer.
- Click on App.
- Click on EasyFileServer.
- Check that only one version appears, as in the screenshot below.
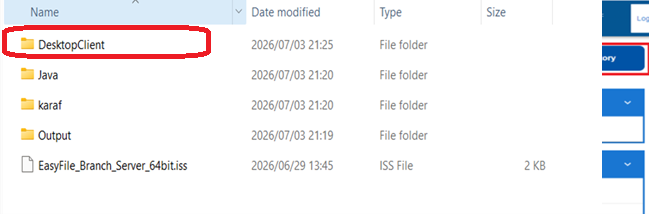
If there is more than one version, or a version with a version number behind EasyFile Desktop Client:
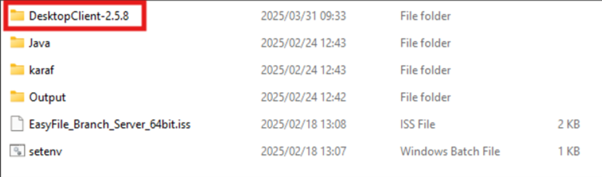
You will need to uninstall e@syFile TC and e@syFile Desktop Client via the control panel, then install the application again.
- Open the Control panel.
- Click on Programs, uninstall a program:

- Go to EasyFileEmployer (and any other version that might appear, but not e@syFile-Employer) and e@syFileTC; right click on them and uninstall.

- After they have been uninstalled, download the application again from the SARS eFiling website, and run the installation. See the download link.
- Wait for 5 minutes while the database is created, then run the application.
What do I need to do if I am unable to download the e@syFile installation file? There is a message in the download notification (in the top-right corner of the browser) that says “This file can’t be downloaded securely”.
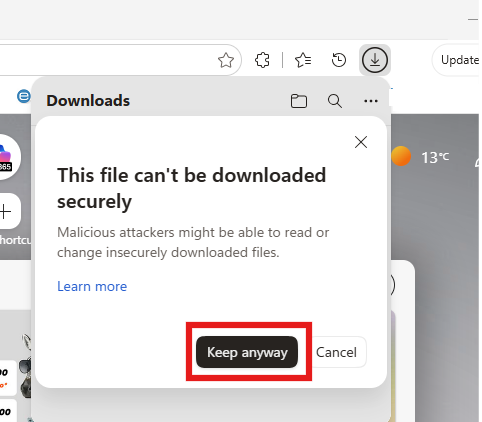
Please download e@syFile via the Edge internet browser.
Follow the steps below.
After completing the form, agree to the terms and click on “Proceed”. Click on the download icon in the top right of the browser (downward pointing arrow).
Right click on the installation file being downloaded and click on “Keep”, then click on the black “Keep Anyway” button that will appear.
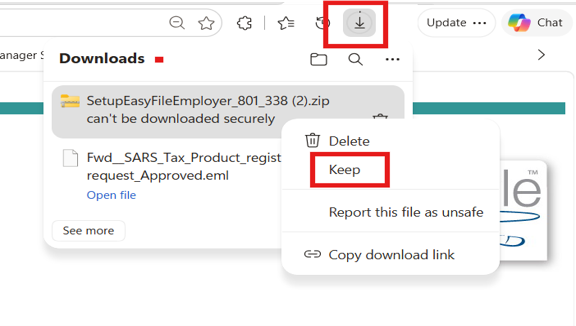
If you opt to download e@syFile via Chrome, follow the steps below:
- Go to Chrome Settings → Privacy and security → Site Settings
- Scroll to Additional content settings → Insecure content
- Under “Allowed to show insecure content”, add the SARS/e@syFile site.
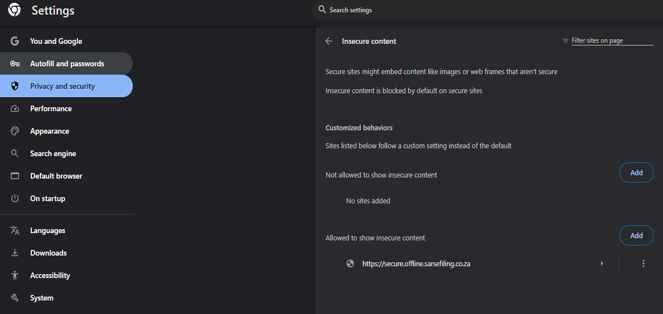
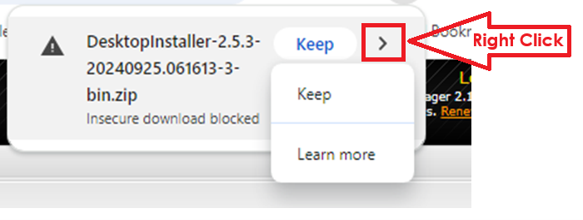
- You may still get a pop-up to keep the file.
Why am I receiving the “za.co.interfront.sars.easyfile.interfaces.localuser.LocalUserAccessInt” error message when attempting to log into e@syFile?
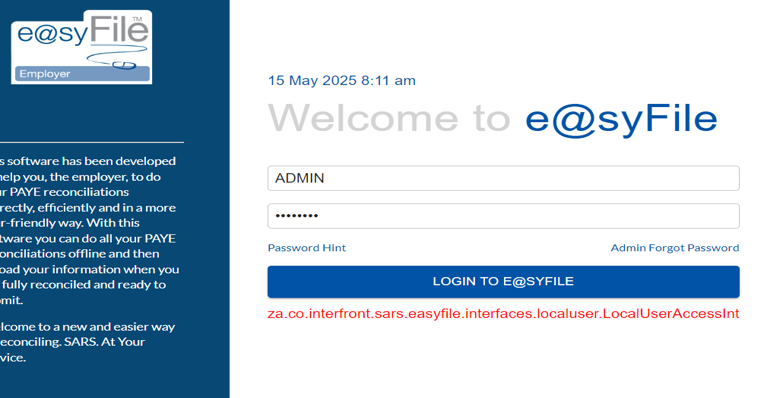
This message sometimes appears after an update. Please uninstall the application from the Control Panel. Then download and install the new version from the eFiling website. This message will no longer appear. Go to the Task manager>services and restart the EasyFileServer service, wait a few minutes, and then open e@syFileTC.
Why does e@syFile display the message “Login Failed. Please confirm that your eFiling profile has been activated on the eFiling website and try again”, after I enter my eFiling login credentials?
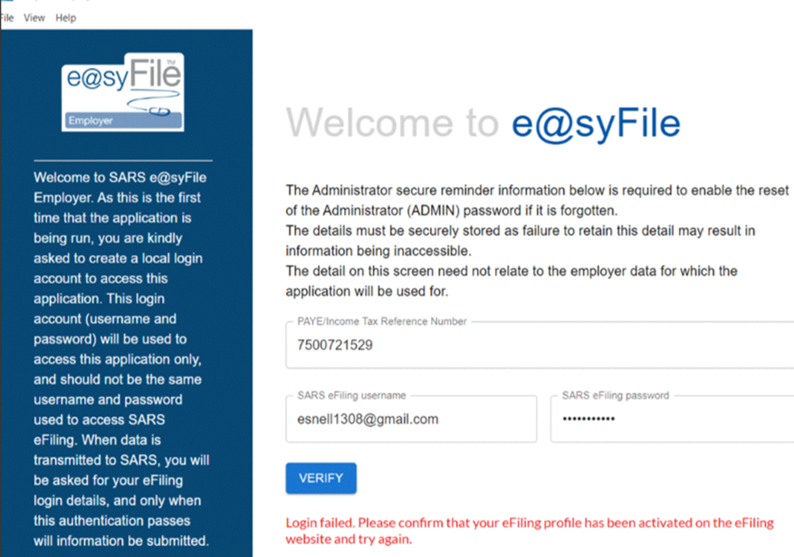
Please ensure that you are using the eFiling credentials of where the PAYE number is activated on eFiling, and that you have the correct rights granted.
To check the User Rights, please follow the below steps on SARS eFiling:
- Go to the portfolio that the company is under on SARS eFiling.
- Click on “Organisations” in the menu at the top.
- Click on “Rights groups”.
- Click on “Manage groups”
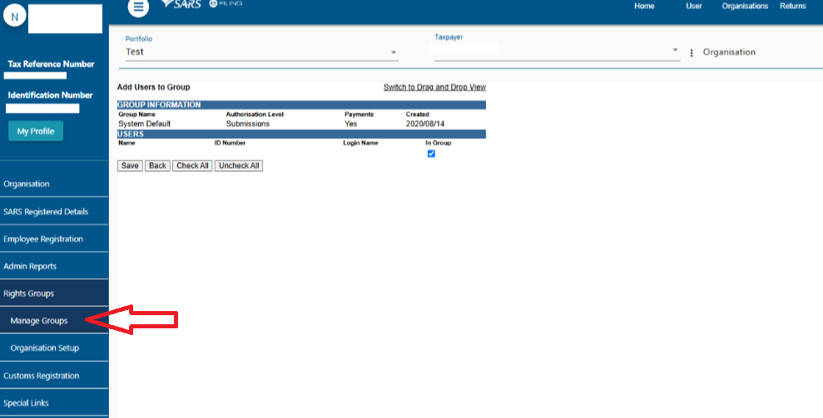
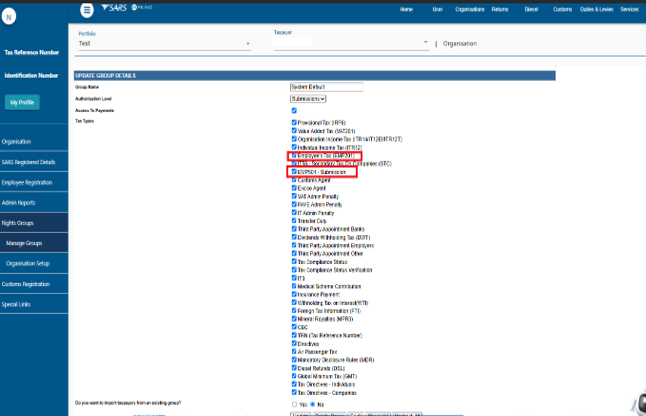
- Click on “open” and make sure that “submissions” is selected in the drop-down box under “authorization level”; check that the relevant options are ticked (EMP501 & EMP201); and then scroll down and click on “save”, then “back”.
- Click on “Manage Payers” and make sure that the taxpayer you are submitting for has its tick box ticked; click on “back”.
- Click on “Manage Users”, click on “Switch to Grid View”, and make sure that the tick box next to your name is ticked to be “In Group”, then click on “save”.
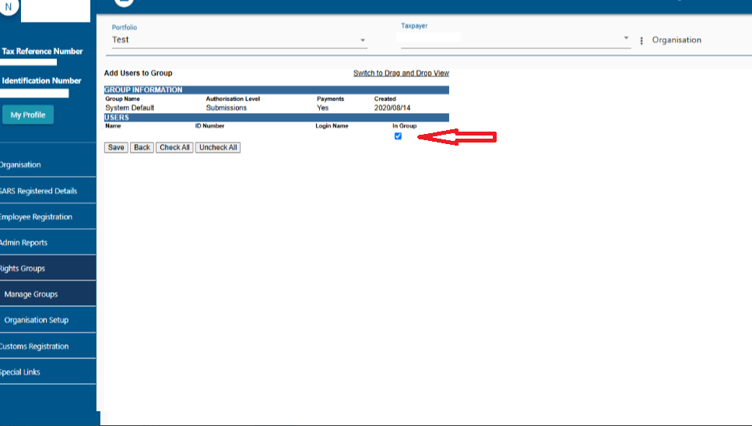
Once the steps above have been completed, please:
- Select User (top menu).
- Select User on the left-hand side.
- Select Change Details and Update Rights.
- Ensure you are using the correct SARS eFiling credentials for the PAYE number that is activated on eFiling. Alternatively, you can use your Personal Income Tax number to create the e@syFile database.
- Make sure System Default is ticked under the correct taxpayer group.
- Check that your eFiling password does not contain special characters such as &, $, or #.
- As a final step: Change your eFiling password so it does not contain repeated special characters (e.g. !!).
- Ensure the eFiling Primary Username matches the e@syFile login name.
Why am I receiving an “Error retrieving version.json” pop-up message on the e@syFile start-up screen?
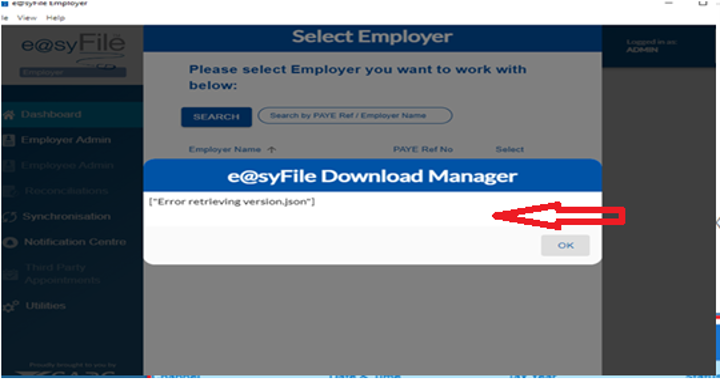
It is just a pop-up message. Please click on “Ok” to proceed.
Why is e@syFile displaying a “za.co.interfront.sars.easyfile.interfaces.localUserAccesInt” pop-up message after I have installed the new version of e@syFile?
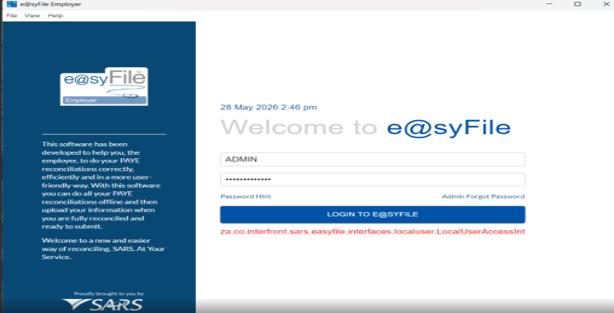
In certain instances, following an update, it may be necessary to restart the new e@syFileTC application service.
- Close e@syFileTC.
- Open the Task Manager.
- Navigate to the Services tab.
- Locate and restart the EasyFileServer service.
- Wait a few minutes, then attempt to log in again.
Alternatively, restarting the computer without opening any other applications may resolve the issue — particularly if the system meets the minimum requirement of 8GB RAM.
Why does e@syFile remain on the “e@syFile Thinclient Update Service. Checking for Updates” pop-up screen when updating to the new version of e@syFile?
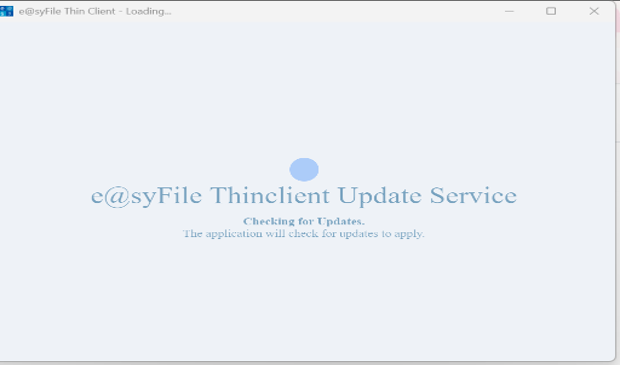
You are on an older version of e@syFile. Uninstall both e@syFile and e@syFileTC from the Control Panel.

Download and install the latest version from the SARS eFiling website.
Do not run the application after installing.
Go to C:\EasyFileEmployer and double-click the EasyFileEmployerDB to see if it opens.
Then run the application to see if it opens correctly.
Why is e@syFile unable to connect to online services and displaying a red “Not Connected” status?
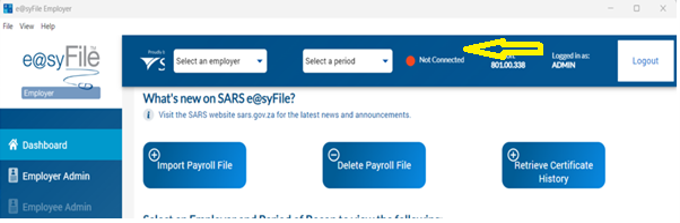
The “Not Connected” status may occur if the application did not receive a response (ping) from the SARS system when it was launched.
In many cases, performing a Sync will force communication with the SARS system, allowing the application to receive a response. Once the communication is successful, the status should update to “Connected”.
Solution 2: Zscaler is a cloud-native cybersecurity platform that replaces traditional corporate firewalls and VPNs. If Zscaler is installed and enabled, there may be a failure to generate the AA88s. AA88s require a successful online connection to SARS systems (even if e@syFile indicates a green connection status, the actual synchronisation may still fail).
Functionality Impacted by Zscaler:
- Online connectivity
- AA88 generation
- Successful submission and processing
Technical Description
Zscaler intercepts and restricts outbound traffic required by the e@syFile application to establish secure connections with SARS servers. As a result:
- e@syFile is unable to go online
- Required authentication and data exchange processes fail
- The AA88 cannot be generated
This behaviour indicates that e@syFile network requests are being blocked or checked by Zscaler, preventing successful communication with SARS endpoints.
Root Cause (Identified)
Zscaler security policies are blocking or interfering with e@syFile traffic, most likely due to:
- SSL/TLS inspection
- Application control policies
- Firewall or web filtering rules
Recommended Action
- Review Zscaler policies affecting e@syFile traffic.
- Configure exclusions/allow-listing for e@syFile and related SARS endpoints
- Disable SSL inspection for the affected application where applicable
- Validate online connectivity and AA88 generation post-change
Conclusion
The issue is infrastructure-related and requires intervention from Internal IT to adjust Zscaler configurations. Without these changes, e@syFile will continue to fail while functioning online and not generate AA88 successfully.
How do I retrieve certificate data From the “old” e@syFile Flex version to e@syFile version 8 (TC)?
It is important to note that the old e@syFile Flex applications’ backup cannot be restored directly into the new e@syFileTC application, because the new application works specifically on a POR (Period of Recon) basis.
In order to restore a certain period backup, you will need the PAYE number and ADMIN password. (These are backups that are saved on your computer.)
- Retrieve Certificate History first (NB: without the database and ADMIN Password, the IRP5s cannot be retrieved).
- Once the retrieval is successful, you can select the employer and the Transaction Year in the Dropdown at the top.
- Select the Reconciliation Tab.
- Select “Accept Data” and “Accept Declaration”.
- File and close the declaration.
- Go to Utilities and Select “Disk Submission”. Select the Full Disc Submission and submit. It will ask you to save it on the local disc.
- The submission will appear as a branch submission at the bottom of the Recon screen under the EMP501 status history, giving the Employer the option in the Actions button dropdown to generate the IRP5s.
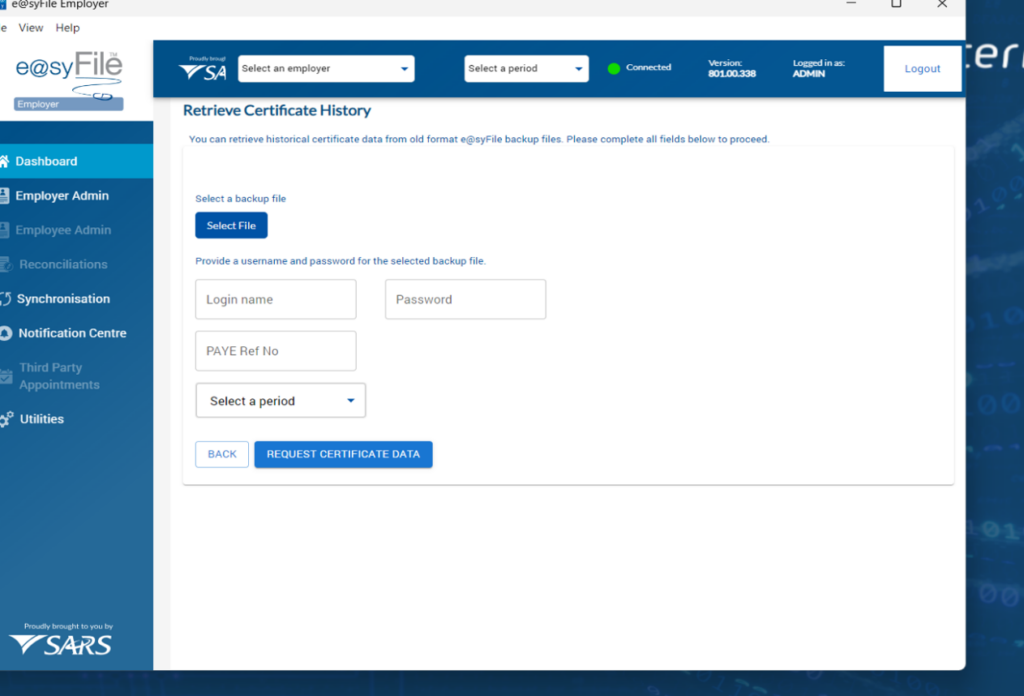
What is the workaround if an IRP5 submission is unavailable due to being submitted on the old e@syFile Flex version?
Why am I receiving a “PDF File Generation Error” when attempting to generate Tax Certificates on e@syFile?
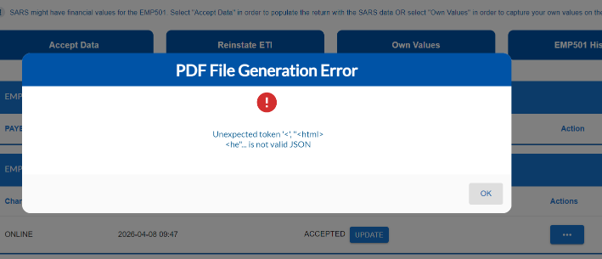
The open applications on your PC may be causing a disruption to the generation of certificates process. Please restart the PC and open only e@syFileTC, no other applications. Then generate the certificates again.
OR
Go to the task manager and type services. In services, restart the EasyFile server.
Log in and try again to see if the certificates will generate.
OR
Check if the certificates were generated in the C:\EasyFileEmployer\App\EasyFileServer\DesktopClient
The folder may look similar to the highlighted insert below.
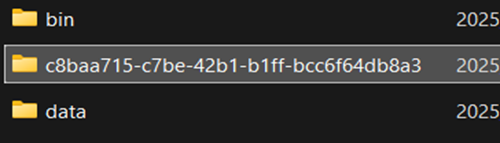
Copy the certificates and save them in a folder of your choice. Once successful, you can delete that folder only in the desktop client folder.
Why am I receiving a “Failed to synchronize AA88 Notices” error when attempting to synchronise e@syFile to retrieve AA88 data?
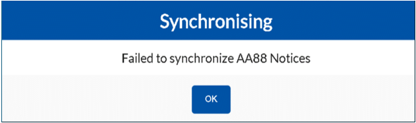
You need to check that e@syFile has the required permissions:
- Access the C drive and open the e@syFile folder.
- Select the e@syFileDB and click continue to proceed.
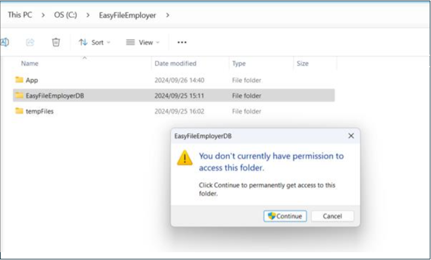
- If there is no response, right-click the e@syFileDB and select properties from the dropdown.
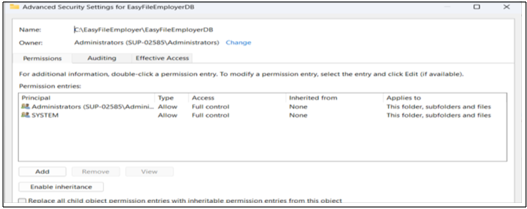
- Select the Security Tab and Advanced.
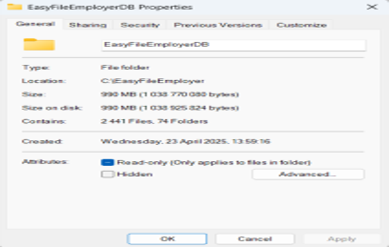
- If you are unable to access any of the options above to view the users and confirm that they have full permissions, please contact your IT department for assistance. Alternatively, check whether you can enable access by selecting the Enable inheritance tab at the bottom of the Advanced window. Apply the changes and close the window. Then refresh or restart the Thin Client.
- Synchronise again to see if you will receive AA88 notices when you search in the Third-Party Appointment / Cancellations.